Host your own analytics service for free with Umami

This post will walk you through installing and setting up your own self-hosted analytics platform. We will use Umami, which is a free and open-source project, available on GitHub. Additionally, Vercel and Heroku will be used for hosting the front-end and database, using their free tiers to get started.
A large part of the web is powered by advertising, this is what keeps your favourite websites running while the content remains free to access for everyone. Analytics and tracking are an important part of this process which allows businesses to monitor how well certain pages are performing and how long users spend on their site. Google Analytics has been the go-to analytics platform for website owners, with its powerful metrics and free usage plans. However, recently some users have begun to move away from Google for privacy reasons, with a lot of end-users also blocking Google tracking with ad blockers and DNS blocklists it has become difficult to get accurate stats and metrics from the data.
Although there are some great alternatives which offer privacy-friendly and transparent platforms (Plausible and Matomo) they aren't free and for smaller projects the cost might be prohibitive. This is why Umami is a great alternative, it offers a great UI, simple setup and can be hosted for free. As it is open-source it is also transparent, and doesn't collect any personally identifiable information.
Prerequisites
- A Vercel account - this account will be used to host the front-end of the application. Umami is built using Next.js, which was created and is maintained by Vercel. They are one of the easiest solutions for hosting Next.js applications.
- A Heroku account - the front-end needs a database connection, using either SQL or Postgresql, to save data and handle user account details. Heroku offers a free Postgres hobby tier which is enough to get up and running with this project.
- A Github/Gitlab/Bitbucket account - you can use any of these services to host your git repository remotely. This account is required to add your project to Vercel.
- Postgresql - this will be used to populate the Heroku database with the fields required to run the application. You can also install it with a package manager such as APT on Linux or Homebrew on macOS.
- NodeJS - NodeJS will be used to run the application locally on your computer to ensure everything is running ok and no errors have occurred.
While Vercel and Heroku will be used for this project, you can use other platforms for hosting the front-end and database if you prefer.
Installation
The getting started instructions for installation can be taken directly from the Umami documentation.
To begin, run a git clone in your terminal to download a local copy of the repository. Once downloaded you can move into the downloaded folder and run the install command to install all the project dependencies. To do this you can open
git clone https://github.com/mikecao/umami.git
cd umami
npm install
You now have the front-end of the application which will be hosted on Vercel, next you need to connect the front-end to a database.
Database setup with Heroku
Umami requires two extra strings, saved as environment variables, to be able to run:
- A database connection URL - Umami supports either MySQL or Postgresql, you can use either one but Heroku only offers Postgres on its free hobby tier.
- A hash salt value - used to generate unique values for each installation, this value can be any random string, e.g. super-secret-hash-value.
To test your project locally, you must create a .env file which will store both variables and allow the application to run on your machine. You can either create this through the command line with the command touch .env or with a code editor such as VS Code.
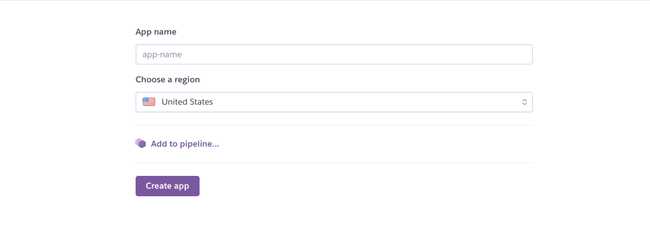
Next, visit Heroku to create an application, this will allow you to create a database on Heroku. Give the app whatever name you want (e.g. my-umami-database) and select Create App.
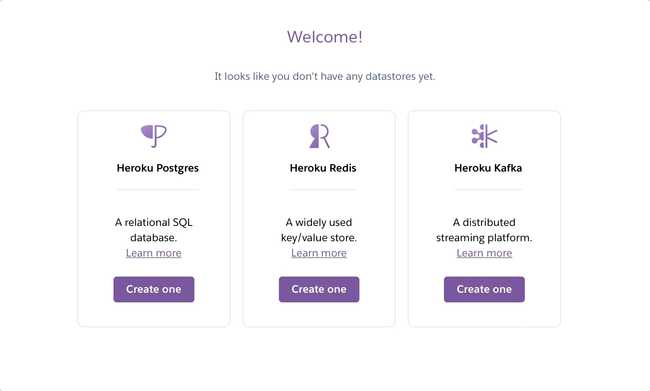
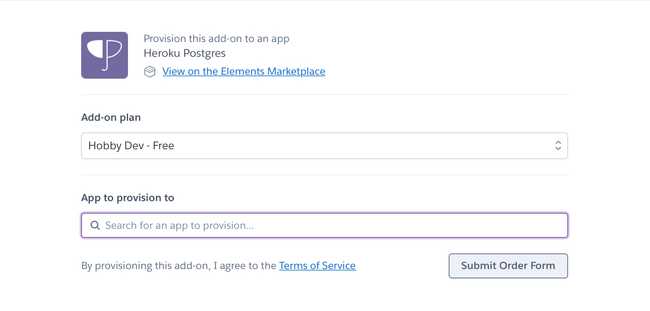
Once you've created your app you can then add the database by visiting the data dashboard on Heroku. Select Heroku Postgres as your choice to move onto the next page. This will bring you to the information page for Heroku Postgres, you can read through the details or just click the Install Heroku Postgres button. On the app provisioning page you will assign your new database to an application hosted on your Heroku account.
Type the name of the application you created in the previous step (e.g. my-umami-database) to provision your new database to that app and click Submit Order Form.
That's all there is to it, you now have your own free Postgres database which can be used to persist your data from Umami. You will be redirected to the resources section of the app where your database will be listed. Click on the Heroku Postgres link with the arrow to go to the database details page.
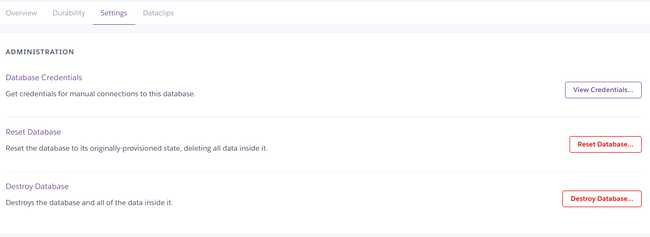
In the settings tab, you will find the View Credentials button. This is where you will find the connection string required by Umami. However, to populate the Heroku database we will use other parts of this information. Keep a note of the information required in the file image below.
You can now add both environment variables to the .env file created earlier. To do this either use a code editor such as VS Code or you can use the terminal with the command nano .env.
Add the two lines, with your URI and random HASH_SALT value.
DATABASE_URL=postgresql://username:mypassword@localhost:5432/mydb
HASH_SALT=super-secret-hash-value
You will need to create the required tables in the database before you can run the application. To create these, run the following command and replace the values with the config variables from the Heroki settings page (make sure you're still in the umami folder in your terminal when running the command).
psql -h <Host> -U <User> -d <Database> -f sql/schema.postgresql.sqlWhen prompted, enter the password from the Heroku settings page, this should run the script and create the necessary database tables. The database is now set up and ready to use.
Testing locally
It's important to test the application locally to make sure everything runs without any errors. To do this, run the following commands, the first will build the application while the second starts the application in development mode.
npm run build
npm run dev
If you want to try the app in production mode just enter the following in your terminal.
npm run build
npm run start
If everything is successful, your application should run and be ready to deploy your application to Vercel. Before moving onto this step, I recommend logging into the application and changing the default password. You can do this by first logging in and then going to the settings page and clicking on the profile tab. The default login credentials are:
Username: admin
Password: umami
Deployment
We're almost done, you now need to upload your project's front-end code. There are two steps to this, you must first push your code to GitHub, and then link that GitHub repository to Vercel.
GitHub/GitLab/Bitbucket
You can start by visiting your prefered git hosting provider, and create a new repository. You should then be able to grab the remote address to add the remote location to your local git repository. To do this run the following command, you can name your remote whatever you want but in this example we will call it analytics. This will add your repository as a remote location and then push your code.
# A small note: after October 1st GitHub will use 'main' instead of 'master' as the default branch name
git remote add analytics master
git push -u analytics master
Vercel
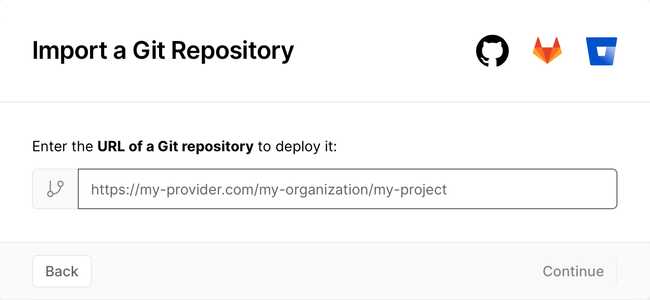
Visit your Vercel account and click the Import Project button. You will then be prompted to paste the link to your online repository from whatever provider you used in the previous step (e.g. https://www.github.com/username/repo-name). Once you click the continue button you just need to assign the project to a team, the default (which is usually your name) is ok to use here.
You will then need to authorize Vercels OAuth app to access your repositories. In the final step, you need to click the dropdown next to the Environment Variables tab. Add the two variables from the .env files you created earlier and click Deploy. Vercel will do the rest and build your app and deploy it onto their platform. Once the build has finished successfully, you can click the link and visit your live analytics platform.
Wrap Up
You now have your own analytics platform, you can log in, add websites and keep track of the metrics important to you. You can read the full Umami Docs and learn about some of its more advanced features. As it is a relatively new project, new features are being added constantly such as the recent addition of a dark mode. To update the package simply run the following commands.
git pull origin master # Pull changes from the source repository
git push analytics master # Add changes to your own personal copy of Umami
The benefit of using Vercel is that every time your repository is updated, it will update the project with any changes or new features that have been added. You now have your own self-hosted analytics platform, if you enjoyed the project, make sure you follow its creator on GitHub.
